Table of Contents
Introduction: Convert a Picture to PDF on an iPhone – Top 3 Methods
Turning a picture into a PDF on your iPhone is something many iPhone users find themselves needing. As we use smartphones more for handling documents, the need for quick and easy conversion methods, like ‘Convert a Picture to PDF on an iPhone,’ has shot up. Whether you’re a student sorting out lecture notes or someone saving receipts, knowing how to do ‘Convert a Picture to PDF on an iPhone’ effortlessly can really change the game.
3 Best Ways to Convert Picture to PDF on iPhone:
1. Using the Files App: A Native Solution
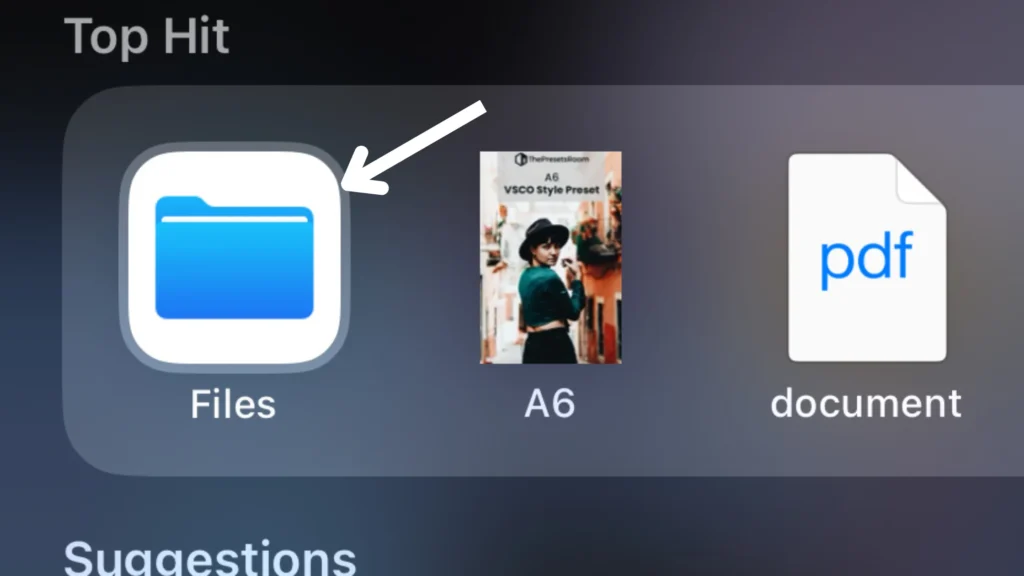
Step 1: Open the Files app:
- Begin by launching the Files app on your iPhone. The app icon resembles a blue folder and is typically found on your home screen.
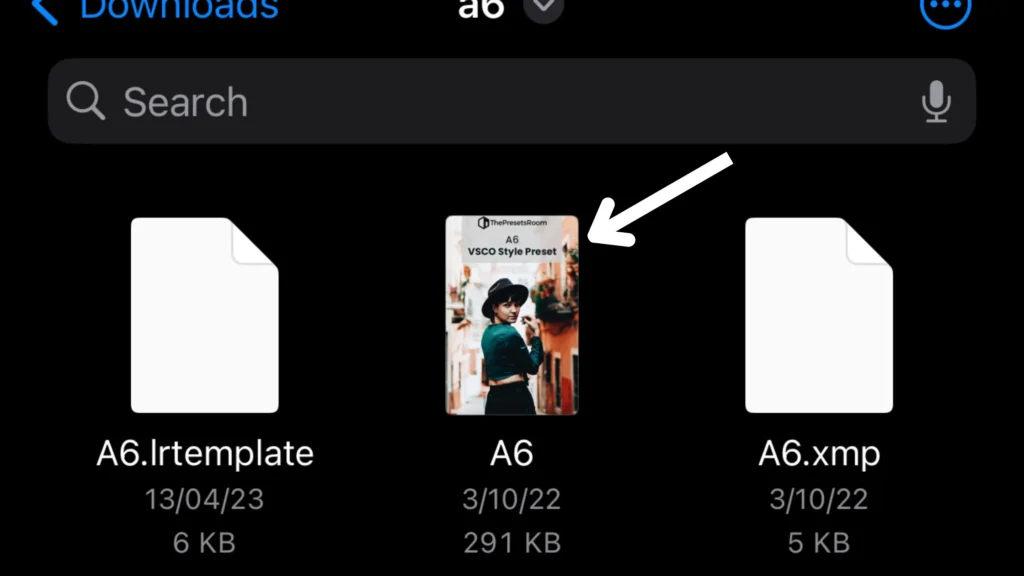
Step 2: Locate the pictures:
- Navigate to the location where your pictures are stored. This could be in the Photos app or any other folder within the Files app.
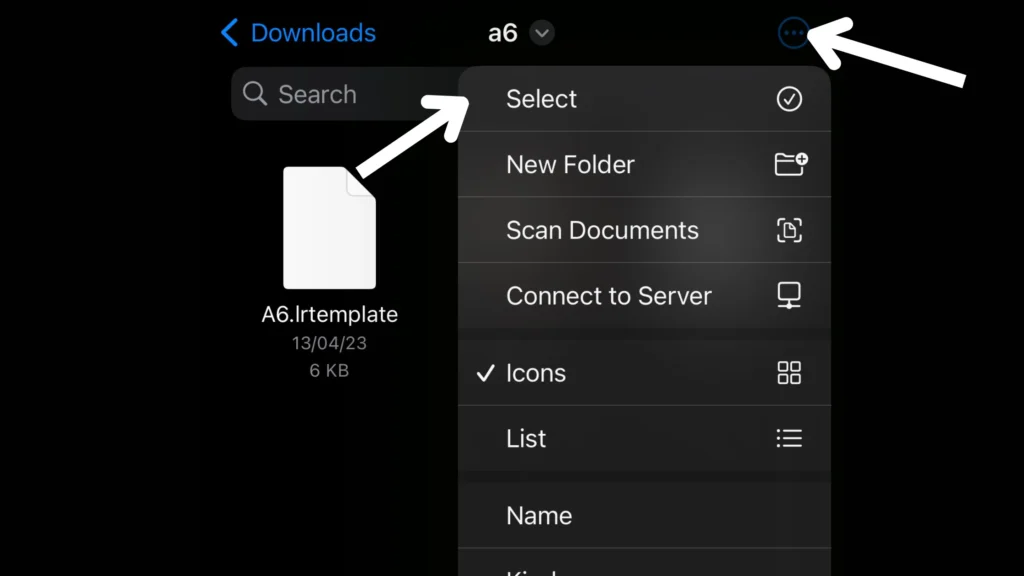
Step 3: Select pictures:
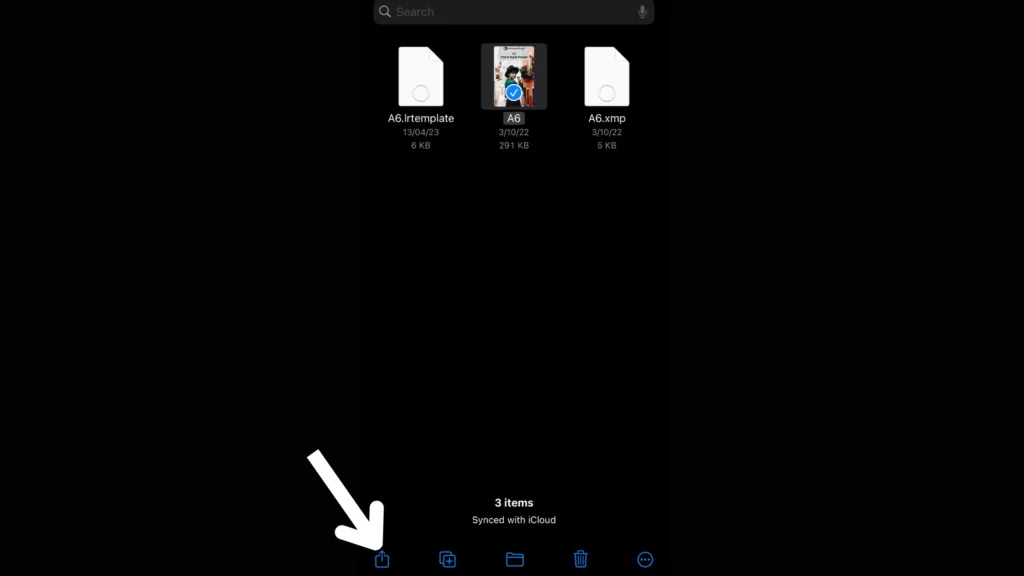
- Tap on the pictures you want to convert to PDF. If you have multiple pictures, use the “Select” button to choose them simultaneously.
Step 4: Access options:
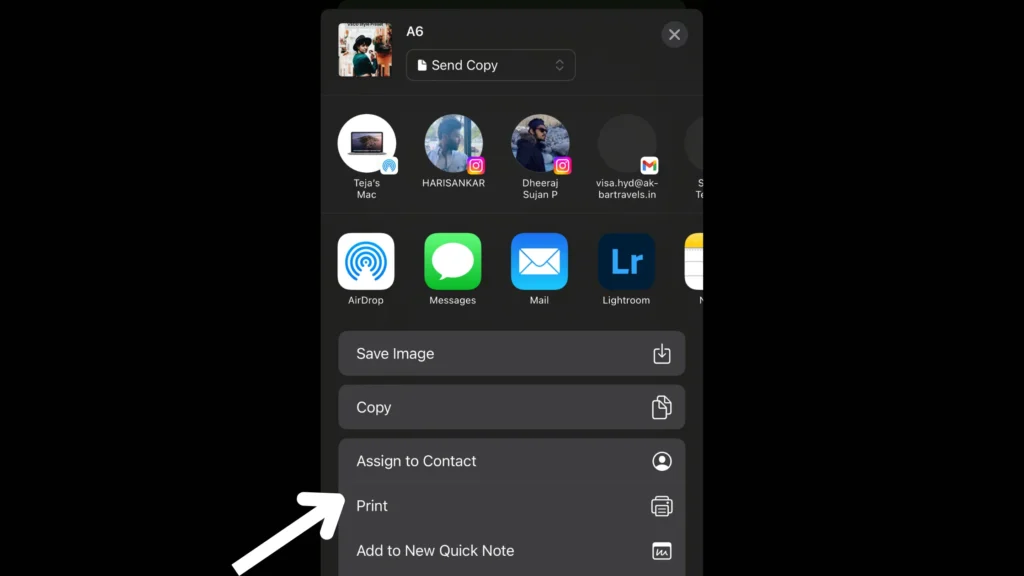
- Then tap the share symbol, “(a box with an arrow)”. You can select “Print.”
Step 5: Create PDF:
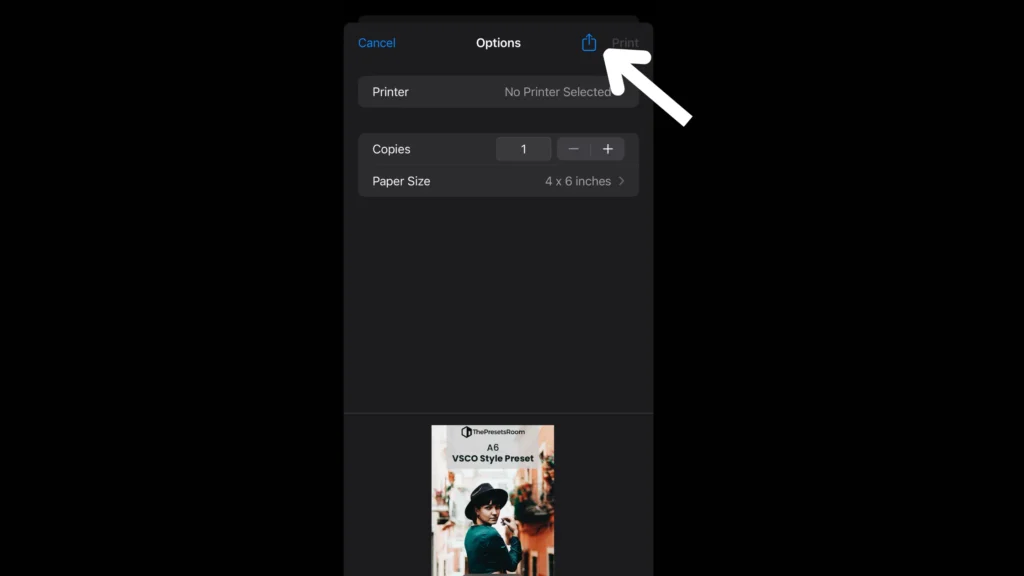
- In the “Print” option, again tap the share icon (box with an arrow).
Step 6: Save the PDF:
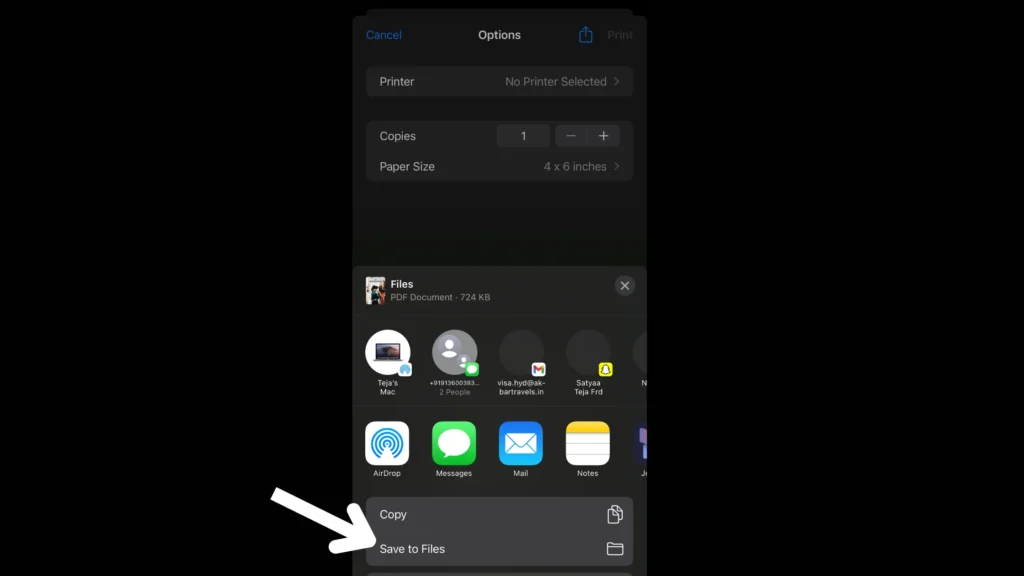
- After tapping on the share option, click “save to file”, and your picture will be saved in PDF form.
Benefits and drawbacks:
Benefits:
- User-Friendly: The Files app is designed with simplicity in mind, making it accessible to users with varying technical expertise.
- Integration with iCloud: If you’re using iCloud, the Files app seamlessly integrates, allowing for easy access to your PDFs across multiple devices.
- Native Functionality: As a native app, Files is readily available on iPhones without the need for additional downloads.
Drawbacks:
- Basic Features: While it’s user-friendly, the Files app offers basic PDF creation features. Users looking for advanced customization may find it limiting.
- Limited Editing Options: The app lacks extensive editing options for fine-tuning the PDF. Users seeking detailed adjustments may need to explore alternative methods.
2. Using a Third-Party App: Adobe Scan
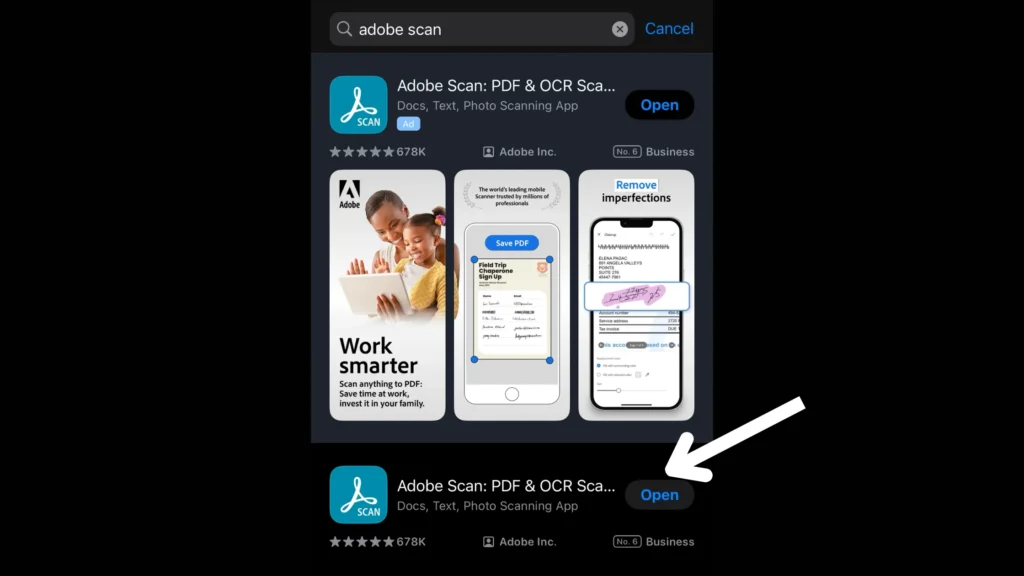
Step 1: Download Adobe Scan.
- Go to the App Store and download Adobe Scan, a free scanning app by Adobe.
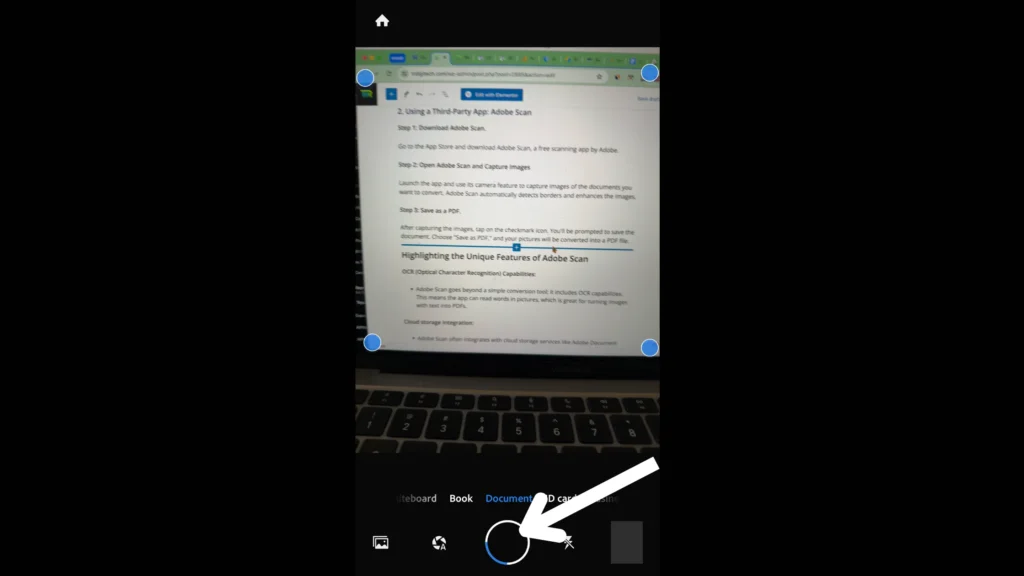
Step 2: Open Adobe Scan and Capture Images
- Launch the app and use its camera feature to capture images of the documents you want to convert. Adobe Scan automatically detects borders and enhances the images.
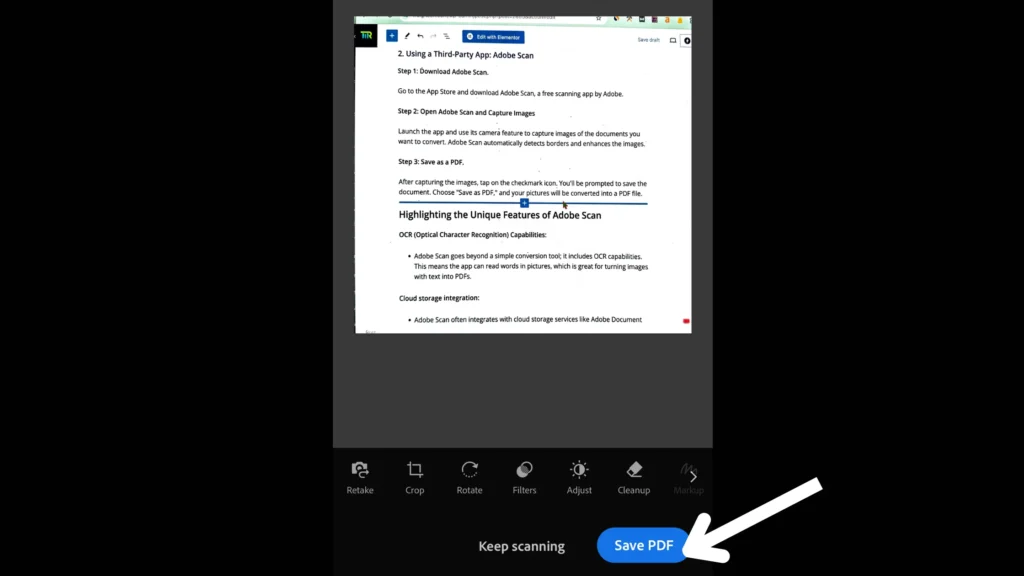
Step 3: Save as a PDF.
- After capturing the images, tap on the checkmark icon. You’ll be prompted to save the document. Choose “Save as PDF,” and your pictures will be converted into a PDF file.
Highlighting the Unique Features of Adobe Scan
OCR (Optical Character Recognition) Capabilities:
- Adobe Scan goes beyond a simple conversion tool; it includes OCR capabilities. This means the app can read words in pictures, which is great for turning images with text into PDFs.
Cloud storage integration:
- Adobe Scan often integrates with cloud storage services like Adobe Document Cloud. This allows users to access their converted PDFs seamlessly across various devices.
User-Friendly Interface:
- The app has a really easy-to-use design, so it’s simple for everyone to navigate, no matter how much you know about technology.
Benefits and drawbacks:
Benefits:
- Advanced Features: Adobe Scan offers advanced features such as OCR, providing users with more than just basic conversion capabilities.
- Quality Enhancement: The app often includes features to enhance image quality during the conversion process.
- Integration with the Adobe Ecosystem: If you’re already using other Adobe products, Adobe Scan seamlessly integrates into the Adobe ecosystem.
Drawbacks:
- Storage Requirements: Due to its feature-rich nature, Adobe Scan may demand more storage space on your device compared to simpler alternatives.
- Learning Curve: For users unfamiliar with Adobe products, there might be a slight learning curve in navigating the app’s functionalities.
3. Using the Shortcuts App: Automation at its Best
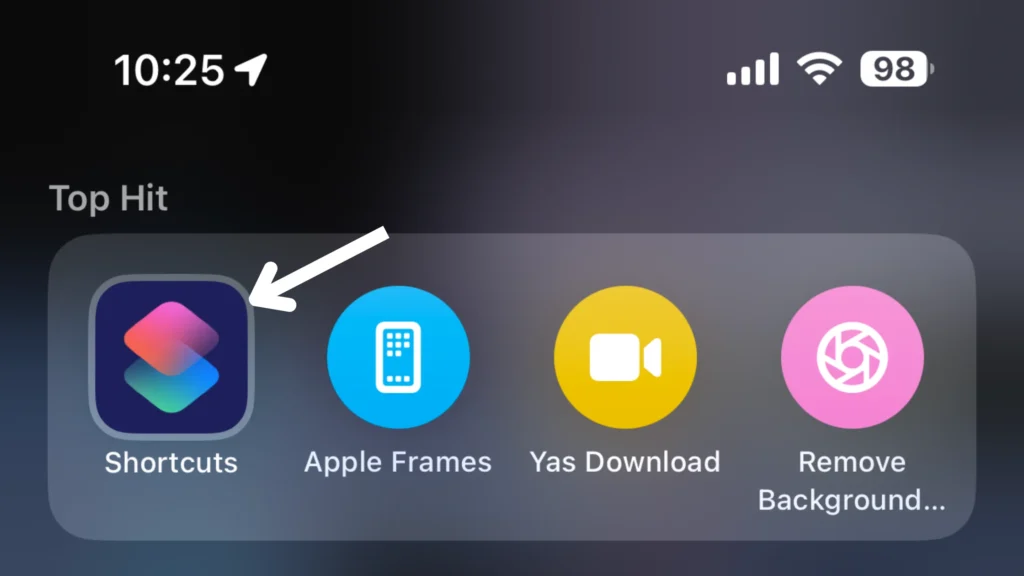
Step 1: Download the Shortcuts app.
Download the Shortcuts app from the App Store if you haven’t already got it.
Step 2: Get the “Make PDF” shortcut.
Open the Shortcuts app and get the “Make PDF” shortcut. If you can’t find it, you can create a simple one:
Add the “Make PDF” Shortcut by clicking here.
Add the “Make PDF” action.
Save the shortcut.
Step 3: Run the shortcut
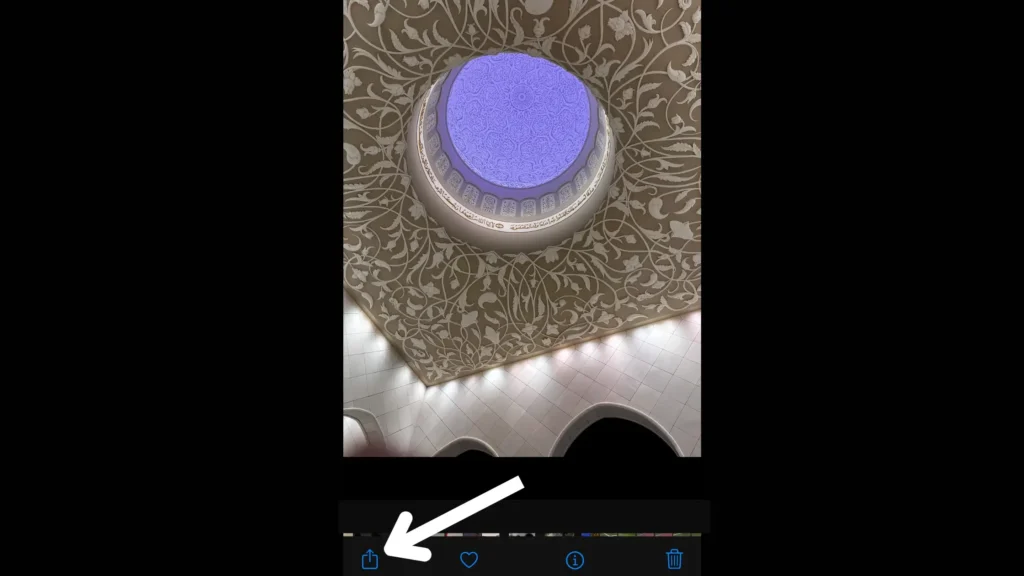
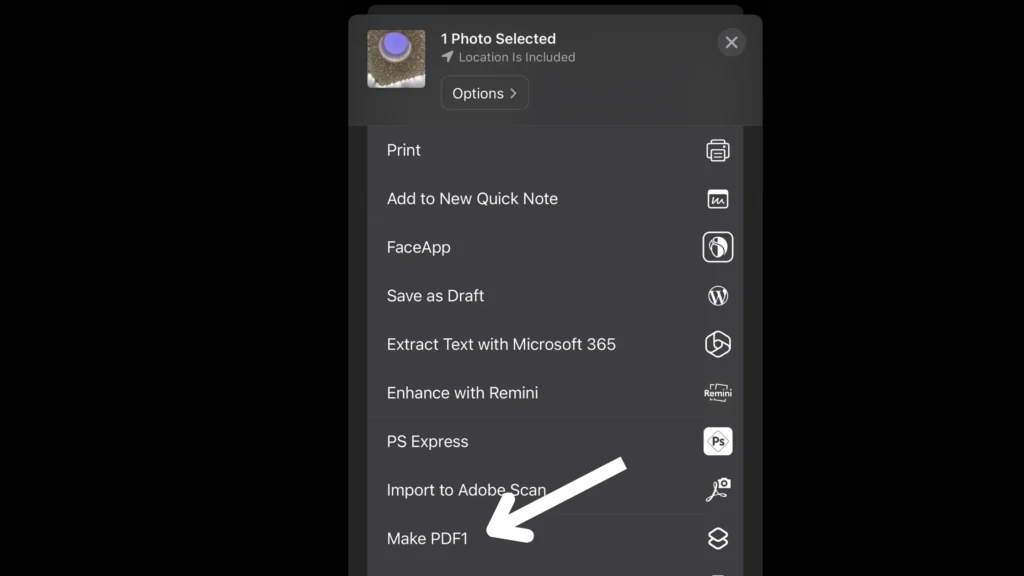
Open the Photos app, select the images you want to convert, tap “Share,” and run the “Make PDF” shortcut. It will create a PDF file from the selected images.
Benefits and drawbacks:
Benefits:
- Swift and personalized:
- Once configured, using the shortcut is swift and personalized. It eliminates the need for repetitive manual steps, streamlining the picture-to-PDF conversion process.
- Versatility:
- You can use Shortcuts for many different tasks, not just turning pictures into PDFs. This shows how flexible and useful the app can be.
Drawbacks:
- Initial Setup Complexity:
- Creating a custom shortcut might be intimidating for users unfamiliar with automation tools. The initial setup requires some understanding of the app’s capabilities.
- Limited Default Actions:
- While the Shortcuts app is powerful, some users might find the default actions limiting for more advanced tasks.
Frequently Asked Questions (FAQs):
Q. Is there a limit to the number of pages I can convert using Siri?
A. The number of pages you can convert with Siri is unlimited, and its powers are incredible. However, for optimal results, it’s advisable to convert images with moderate content to ensure accuracy.
Q. Can I annotate the PDFs created using the Notes app?
A. Absolutely! The Notes app allows you to not only convert images to PDF but also annotate them. Simply open the PDF in the Notes app, tap the markup icon, and unleash your creativity.
Q. Do these methods compromise image quality?
A. No, Apple’s conversion methods prioritize image quality, ensuring that your PDFs retain clarity and sharpness. The algorithms used in the Notes app and Siri optimization maintain the integrity of your visuals.
Q. Are there third-party apps that offer additional features for PDF conversion?
A. Yes, a lot of third-party apps in the App Store provide sophisticated capabilities like batch processing, optical character recognition, and adjustable settings for converting PDFs.
Q. Can I convert PDFs back to images on my iPhone?
A. While the native features primarily focus on converting images to PDFs, there are third-party apps available for reversing the process. With these apps, you can take pictures out of PDFs you already have, giving you more options for managing your documents.
Q. Is there a way to password-protect the PDFs created on the iPhone?
A. Yes, the Notes app allows you to add a password to your PDFs for an extra layer of security. Open the PDF in Notes, tap the share icon, and select “Password Protect PDF.” Set your password, and your document is now secure.
Summing Up: Proficient ‘Convert a picture to PDF on an iPhone’
Summing up our journey into making your iPhone a wizard at turning pictures into PDFs, let’s focus on the key points. Whether you go for the simple Files app, explore the fancy features of Adobe Scan, or get creative with Shortcuts, each way has its strengths in smoothly convert a picture to PDF on an iPhone. The key here is making it all user-friendly.
The goal is to convert a picture to PDF on an iPhone as a breeze. Think of each method as a tool—you have the freedom to choose what suits your way of handling documents and mastering the skill of “Convert a picture to PDF on an iPhone.” As we wrap things up, I recommend exploring these methods and finding the one that clicks with you in the realm of “Convert a picture to PDF on an iPhone.” Your journey to efficiency with your iPhone is unique, and discovering the right approach brings a touch of simplicity to your overall iPhone experience.
You May Also Like: